Crazytown Peanut Butter Banana Bread

Picture 349 copy

Let me clarify a point: when I say ‘crazytown’ I mean ‘holy cow, there is so much good stuff in this bread and my impatience doesn’t allow me to list it all.’ I DO NOT mean Crazytown the band that sang that maddeningly catchy song ‘Butterfly’ way back in the day.

But I won’t lie, I liked them. I thought Shifty was cute (for like a week HA!) I know every word to the entire song.

Picture 370 copy

I used to have problems. Don’t verify that with my hubby, he’ll tell you I still have problems. He calls it issues, I call it awesome!!

There is a whole lot of awesome going on in this bread: peanut butter banana bread studded with mini peanut butter cups, snickers, chocolate chips AND caramel. I added some whole wheat pastry flour, you know… to make it “healthy.” I told you, crazytown!!

1  3

And I just couldn’t help myself, I never can leave well enough alone, I drizzled the top with melted bittersweet chocolate. Crazytown.

Come my lady, come come my lady. You’re my butterfly, sugar baby. Oh gosh…

Picture 361 copy
Crazytown Peanut Butter Banana Bread
Yields one 8×4″ loaf

Ingredients:

1 cup all purpose flour
1/2 cup whole wheat pastry flour (or more AP flour)
1/2 teaspoon baking soda
1 1/2 teaspoon baking powder
1/2 teaspoon salt
2 very ripe bananas, mashed
1/2 cup smooth peanut butter
1/4 cup vegetable oil (you can also use canola)
1 large egg
1/2 cup granulated sugar
1/4 cup brown sugar
1 teaspoon vanilla extract
2 oz mini peanut butter cups (I used these)
8 mini snickers, chopped
2 oz milk chocolate chips
8 caramels, chopped

Note: I used an 8×4″ pan but you can use a standard 9×5″ you loaf will be slightly thinner and will bake faster, so keep an eye on it! Also, go nuts with the mix-ins: add toffee bits, different candy bars, nuts, toasted coconut, etc.

Instructions:

Preheat your oven to 350F. Generously grease your loaf pan  with butter or spray with non-stick cooking spray; set aside.

In a medium bowl whisk together your flour, baking soda, baking powder and salt until combined, set aside.

In a large bowl stir together your bananas, peanut butter, oil, egg, sugars and vanilla extract. Whisk vigorously for about 30 seconds to ensure that everything is thoroughly combined. The batter will be a bit lumpy because of the bananas, that’s ok!

Pour your dry ingredients into your wet ingredients and, with a rubber spatula, fold everything together until just combined (the flour JUST disappears.)

Fold in your mini peanut butter cups, snickers and chocolate chips. Spread half of the batter into your prepared pan. Sprinkle the chopped caramels over the batter and give them a light press with your hand. Top with the rest of your batter and smooth the top with your spatula.

Bake for approx 1 hour or until toothpick inserted into center comes out with moist crumbs attached (always check your baked goods early, every oven is different and there’s nothing worse than a rock-solid loaf).

Let cool in pan for 10 minutes, then loosen the edges of the pan with a plastic knife and remove from loaf pan, transferring bread to a cooling rack. Cool completely, or don’t, just don’t burn your tongue. Enjoy!

Picture 358 copy

Recipe adapted from Cookies & Cups

Bourbon Vanilla Ice Cream with Salted Bourbon-Caramel Sauce for Sundae Sunday!!

Picture 312 copy

Did you ever have ice cream socials in school? I did. I was lucky, I had them in elementary school and my last one was in high school. To the teachers, it was a comfortable social setting for all the kids to get to know one another. For me, it was an excuse to have copious amounts of ice cream with sprinkles while hanging out with my friends and ditching class with permission 😉 I was a good kid.

Now I am…. a bit older, and I am honored to join in on an online ice cream social with some Twitter friends. Any excuse to make ice cream, right? Not only did I get to make and post about ice cream, I get to see the amazing creations of my twitter peeps AND eat the ice cream that I made.

1 3 4

And with triple digit weather around these parts, my inner peace really needed the calming qualities of ice cream…. and bourbon. I’m still a good kid 😉

If you know me at all, you know that I couldn’t just make any ole ice cream, I had to go all out. I scoured my bookmarks and came across this recipe that I had long forgotten about, checked that I had all the ingredients and I was off. And I can’t be happier with how it turned out! The ice cream is creamy and delicious, the sauce compliments it wonderfully, and the toffee adds texture! Win-win-win.

Now if only this ridiculous heat wave would GO AWAY, life would be pretty much perfect 🙂

I am honored to have participated in Sundae Sunday along with some great company. To see the entire line-up of amazing treats from amazing bloggers, head on over to Di’s blog, or click here to be taken directly to the post.

Picture 304 copy

Bourbon Vanilla Ice Cream
Makes 1 1/2 pints

Ingredients:
1 cup Bourbon (you can probably dial this down to 3/4 cup if you aren’t a huge fan)
1/2 cup granulated sugar
1/4 teaspoon kosher salt
1 teaspoon pure vanilla extract (I used a bit of vanilla bean paste as well)
2 cups heavy cream
4 large egg yolks
1 cup whole milk

Directions:
1. Pour the bourbon into a saucepan, and bring it to a boil over medium-high heat. Add the sugar and salt. Stir until the sugar dissolves, about 2 minutes. Reduce heat to medium, and continue to boil until liquid is reduced by one fourth, about 6 minutes. At this point you’ll notice the strong scent of the bourbon. Don’t inhale too deeply, you’ll get drunk. Just kidding.

2. Add vanilla and cream, and heat over medium heat until a candy thermometer reads 150 degrees F, 2 to 3 minutes.

3. In a large bowl, beat the egg yolks, and pour the bourbon cream into the eggs in a thin stream, whisking until the liquids are combined. Return the mixture to the pan, and heat over medium heat, stirring, until the candy thermometer reaches 175 degrees F, 3 to 4 minutes. Add milk. Transfer the ice cream base to a container with a lid, and refrigerate for 4 hours or overnight. Don’t expect this to be very thick, it will be quite thin for an ice cream base.

4. Pour the chilled bourbon custard into an ice cream maker, and churn according to the manufacturer’s instructions. Transfer the ice cream to a container with a tight-fitting lid, and cover the surface of the ice cream with plastic wrap. Put the lid on the container, and freeze until the ice cream has hardened, at least 2 hours. (It will keep for up to 1 month.)

Salted Bourbon-Caramel Sauce

Ingredients:
1 cup granulated sugar
1/4 cup water
2 tablespoons light corn syrup (I used Lite)
3/4 cup heavy cream
4 tablespoons butter (salted or unsalted, doesn’t matter)
1 teaspoon sea salt
1/4 cup Bourbon

Directions:
1. In a small saucepan, combine the sugar, water and corn syrup. Bring to a low boil.

2. Gently swirl the mixture in a circular motion (do not stir), and allow it to boil down until it is a deep amber color, at least 10 minutes.

3. Carefully whisk in the cream, protecting your hand from the steam. Immediately whisk in the butter. Stir over low heat until mixture is smooth.

4. Stir in salt and bourbon, and whisk again. Remove from heat and allow to cool before using.

Top a few scoops of ice cream with the caramel, stick in some delicious toffee, grab a spoon and enjoy.

5  6

All recipes adapted from Adapted from here

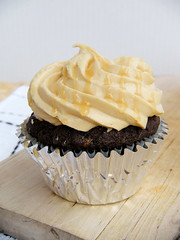
Chocolate Banana Cupcakes with Peanut Butter Caramel Buttercream

Picture 159 copy

And now, a haiku dedicated to my black bananas:

Unloved and hiding.
Begging for a second life,
In batter they go.

That’s my attempt at something cute at 10:30pm after a tough run, a tortilla for dinner, a headache, and a fitful night of sleep. Leave me be.

Picture 172 copy   Picture 173 copy

I saw these on Tracey’s blog a while ago and I was overwhelmed by the cuteness of them and promptly remembered two black straggling bananas that needed a new home as their stay in my fridge was coming to an end. You see, they party loudly late at night and it keeps me awake. So they had to go.

1 3 4

Chocolate and nanners are a great match. Nanners? I don’t think I’ll be saying that again. Next time I’ll toss in some peanut butter chips and drizzle with melty peanut butter just to mix things up. The cake portion was very soft and moist, chocolatey and banana-y, perfectly balanced. Topped off with this super easy peanut butter caramel frosting, a drizzle of chocolate or caramel (or both ;P) and you’re good to go! Add a chocolate covered espresso bean, if you’re fancy.

Picture 175 copy

Chocolate Banana Cupcakes
adapted from Tracey’s Culinary Adventures

1/2 cup heavy cream (recipe states coconut milk but this is what I had on hand)
1/2 cup ripe banana, mashed (about 1 banana, although I used 2 bananas)
1/3 cup vegetable oil (recipe states canola oil, again use what you have)
1 teaspoon vanilla extract
3/4 cup sugar
1 cup all-purpose flour
1/3 cup Dutch-process cocoa powder (I subbed black cocoa for 2 TBSP of the regular cocoa)
3/4 teaspoon baking soda
1/2 teaspoon baking powder
1/4 teaspoon salt

To make the cupcakes: Preheat oven to 350 F. Line a muffin tin with paper liners.

(A semi-helpful tip to quickly mash your bananas: break up bananas into a mixer bowl and whiz them around on med-high speed until they resemble barely chunky baby food. You can achieve this with a bowl and a hand mixer, but this creates more dishes ;P)

In a medium bowl, whisk the mashed banana, heavy cream, sugar, oil and vanilla until well combined. The mixture won’t be completely smooth, but mix vigorously to get out as many of the large lumps as possible. In a second medium bowl, whisk the flour, cocoa powder, baking soda, baking powder and salt together. (Sift your cocoa into this mixture if it appears clumpy). Add the dry ingredients to the bowl with the wet ingredients and gently whisk (or fold with a rubber spatula) until flour just disappears.

Distribute the batter evenly among the liners, filling each about 1/2 – 2/3 full (an ice cream scoop works great for this). Bake for 18-20 minutes, or until the cupcakes spring back when lightly touched and a toothpick inserted in the center comes out clean. Remove the muffin pan to a wire rack. Let the cupcakes cool in the pan for 5 minutes then transfer them to the wire rack to cool completely.

Makes 12 cupcakes

Picture 168 copy

Peanut Butter Caramel Buttercream
from Cook’s Illustrated

8 tablespoons unsalted butter, at room temperature
1/2 cup smooth peanut butter (not natural)
3/4 cup confectioners’ sugar
pinch table salt
1/2 teaspoon vanilla extract
1 tablespoon caramel sauce

In a stand mixer fitted with the whisk attachment (I used the paddle because I’m a rebel. Or I don’t read the recipe well enough), beat butter and peanut butter at medium-high speed until smooth, about a minute. Add the confectioners’ sugar and salt to the bowl and beat at low speed just until the sugar is moistened, about 30 seconds. Scrape down the sides of the bowl and beat the mixture on med-high until fully combined. You’ll notice it taking on a lighter color and a more uniform texture, this is perfect. Finally, mix in the vanilla and caramel sauce and beat on med-high to incorporate. Scrape down the sides of the bowl again then beat on medium speed until the frosting is light and fluffy.

Pipe the frosting onto the cooled cupcakes and garnish with caramel drizzle, melted chocolate or anything your heart desires.

Makes about 1 1/2 cups (enough to frost 10-12 cupcakes)

Picture 157 copy

Brown Sugar Vanilla Ice Cream

Picture 362 copy

As I sit here and watch TV, it amazes me the things you’ll see.

A woman coming clean about having slept with her sister’s boyfriend and fathered his child and hid it not only from her sister, her fiance but her sister’s fiance as well. SURPRIIIISE.

A tribute to hollywood couples, some of which make me misty-eyed (and make my top list too!)

Ozzy and Bieber in a commercial together. There was also something about 6G?!

And Anne Hathaway being tackled by James Franco.

None of this has anything to do with this ice cream, but eating a bowl while you watch trashy tv couldn’t get any more perfect. Unless you drizzled it with hot fudge or caramel sauce. Just sayin’

This ice cream is so creamy dreamy delicious. It gets its deeper flavor from the vanilla beans and brown sugar. A match made in heaven.

The only odd ball ingredient is the dry milk powder, which is usually sold in bigger than necessary boxes. But have no fear, you’ll be making this ice cream again and again!

Brown Sugar Vanilla Ice Cream
From the Sweet Melissa Baking Book

Ingredients:
2 cups heavy cream
1 cup skim milk
1/2 cup firmly packed light brown sugar
1/8 teaspoon salt
1/4 cup dry skim milk powder
5 large egg yolks
1/2 teaspoon pure vanilla extract
1/2 vanilla bean, split & scraped, reserving the seeds & pod

Directions:
1. Fill a large pot with about 3 inches of water and bring to a simmer. Set a large bowl over the top, and check that the bottom of the bowl does not touch the water (this is a double broiler or bain-marie setup). (Remove the bowl and use it to combine the ingredients for the ice cream.)

2. In the large bowl, whisk together the heavy cream, milk, brown sugar, salt, skim milk powder, egg yolks, vanilla bean and seeds, and vanilla until completely combined.

3. Place the bowl on top of the simmering pot. Be sure the water is simmering, not boiling. Cook, stirring constantly, until the mixture has thickened to nappante (thick enough to coat the back of the spoon), 5 to 10 minutes or approximately 180 to 185°F on a candy thermometer.

4. Cool the custard in an ice bath. Strain the mixture into a resealable container. Refrigerate for 4 hours or overnight.

5. Pour into an ice cream maker and freeze according to the manufacturer’s instructions. *

6. Transfer to a resealable container and freeze 4 hours or overnight before serving.

* If you don’t have an ice cream maker but you have a food processor or blender just strain the mixture into your processor bowl and refrigerate for 4 hours. Once it is cooled, stick it in the freezer for half an hour. Pull it out of the freezer and stick it onto the base and pulse it until it looks smooth again. Repeat this process for 2-3 hours. Once it is frozen and creamy, put it in a resealable container and store in your freezer.

1 3

Day 19: Chocolate Mint Brownies + 3 Extra Variations

1 2
3 4

Christmas is almost here.

There are Christmas songs playing non-stop wherever you go. Seriously, it follows you!

There are stockings hung by the chimney with care and I’m pretty sure visions of sugar plums are dancing in your head.

Oh, not to mention there is toxic sludge colored mint on top of brownies.

Whaa?

5 6

Day 19 of my extravaganza and I am sharing brownies. Yummy, fudgy brownies. Yummy, fudgy brownies with a layer of toxic sludge colored mint on top of them. Yum.

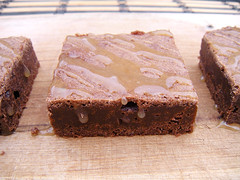
But seriously, these are great!! The brownies themselves are a great plain canvas for any number of mix ins and toppings. Just be sure not to have such a heavy hand with the gel food coloring… that stuff is POTENT! Easy does it. Unless toxic sludge green is your favorite color. In which case, color away!!

Chocolate Mint Brownies
adapted from The Joy of Baking via My Baking Addiction

Brownie Layer:
1/2 cup (113 grams) unsalted butter, cut into pieces
4 ounces (114 grams) unsweetened chocolate, coarsely chopped
1 1/4 cups (250 grams) granulated white sugar
1 teaspoon pure vanilla extract
2 large eggs
1/2 cup (70 grams) all purpose flour
1/4 teaspoon salt

Mint Layer:
2 tablespoons(28 grams) unsalted butter, at room temperature
1 cup (115 grams) confectioners (powdered or icing) sugar, sifted
1 – 1 1/2 tablespoons heavy cream
1/2 teaspoon pure peppermint extract or 1-2 tablespoons crème de menthe
green food coloring (optional)

Chocolate Glaze:
3 ounces (90 grams) semisweet chocolate, chopped
1 tablespoon (14 grams) unsalted butter

Directions:
Preheat oven to 325 degrees F (160 degrees C) and place the rack in the center of the oven. Have ready a 9 x 9 inch (23 x 23 cm) square baking pan that has been lined with aluminum foil across the bottom and up two opposite sides of the pan. Set aside.

Brownies: In a stainless steel (heatproof) bowl placed over a saucepan of simmering water, melt the butter and chocolate. Remove from heat and stir in the sugar and vanilla extract. Add the eggs, one at a time, beating well (with a wooden spoon) after each addition. Stir in the flour and salt and beat, with a wooden spoon, until the batter is smooth and glossy and comes away from the sides of the pan (about one minute). Pour the brownie batter evenly into the prepared pan.

Bake in the preheated oven for about 25 minutes or until the brownies start to pull away from the sides of the pan and the edges of the brownies are just beginning to brown. A toothpick inserted in the center of the brownies will come out almost clean. Remove from oven and place on a wire rack to completely cool.

Mint Layer: In the bowl of your electric mixer or with a hand mixer, beat all the ingredients until smooth. Add a few drops of green food coloring if you want the frosting green. If the frosting is too thick, add a little extra cream. (The frosting should be just thin enough to spread.) Spread the frosting evenly over the cooled brownie layer. Place in the refrigerator for about 5-10 minutes or until firm.

Chocolate Glaze: In a heatproof bowl over a saucepan of simmering water, melt the chocolate and butter. Spread over the mint filling and refrigerate for about 30 minutes or until the chocolate glaze starts to dull.

To Serve: Remove the brownies from the pan by lifting with the ends of the foil and transfer to a cutting board. With a sharp knife, cut into 30 squares. It is a good idea to wipe your knife between cuts with a damp cloth to get clean cuts. These brownies can be stored in the refrigerator for several days or else frozen.

Makes about 30 1-inch (2.5 cm) squares.

Optional Garnishes:
chopped peppermint bark (sprinkle over warm brownies and let come to room temp)

7 8

10-20-08 032 copy

chopped candy cane oreos (sprinkle over warm brownies)

9 10

10-20-08 046 copy

a few dollops of caramel sauce (lightly swirl into batter before baking)

Shipping Safe: YES. Brownies can ship great if packed snugly so they do not move around in whatever tin/box you place them in.
Make Ahead and Freeze: YES. Bake the brownies, cool to room temp, wrap tightly and freeze. Take them out one day before they are needed and let them thaw in the fridge and continue with the mint filling and topping.

Day 16: Caramel Surprise Chocolate Cookies

10-20-08 301 copy

Who loves surprises?? I know I do!!

Flowers on a random Tuesday.

A surprise party for my birthday.

A puppy for Christmas.

A pony for New Years…. hey, I’m just sayin’ …

And a caramel surprise in the center of a delicious chocolate cookie. Yes, surprises are fantastic!

Welcome to day 16 of my Christmas Extravaganza!! There’s lots more to come so be sure to come on back!

1 2
3 4

These cookies aren’t exactly ‘Christmas-y’ but they were too good not to share. Plus, who ever said that all Christmas cookies had to be laden with peppermint or ginger? Certainly not I. Who am I to stifle your caramel centered dreams?

The chocolate cookie is to die for, the melty caramel makes it killer (albeit, diet killer) but I digress… please make these. Your taste buds will thank you. As will the recipients of these cookies, should you choose to share, of course.

10-20-08 312 copy

Rolo Stuffed Chocolate Cookies
Adapted from Pillsbury via My Baking Addiction
yield | about 4 dozen cookies

Ingredients:
2 ½ cups all-purpose flour
¾ cup unsweetened Cocoa Powder (I used King Arthur’s double dutch dark cocoa)
1 teaspoon baking soda
1 cup sugar
1 cup firmly packed brown sugar
1 cup butter, softened
2 teaspoons pure vanilla extract
2 eggs
48 Rolo® Chewy Caramels in Milk Chocolate; unwrapped (I made half with Rolo’s and half with Brach’s Milk Maid Caramels)

4 oz. vanilla-flavored candy coating, optional
sea salt or crushed candy canes, optional

5 7 6

Directions:
1. In medium bowl, combine flour, cocoa and baking soda; mix well.
2. In large bowl, combine 1 cup sugar, brown sugar and margarine; beat until light and fluffy. Add vanilla and eggs; beat well. Add flour mixture; blend well. If necessary, cover with plastic wrap; refrigerate 30 minutes for easier handling.
3. Preheat oven to 375°F. For each cookie, with lightly floured hands, shape about 1 tablespoon dough around 1 caramel candy, covering completely. Place dough balls 2 inches apart on ungreased cookie sheets.
4. Bake at 375°F. for 7 to 10 minutes or until set and slightly cracked. Cool 2 minutes; remove from cookie sheets. Cool on wire rack for 15 minutes or until completely cooled.

For a little extra pizazz: Melt candy coating in the microwave according to package directions. Drizzle over cookies. Sprinkle with salt or crushed candy canes, if that’s you’re thing.

10-20-08 316 copy

Shipping Safe: YES. Be sure to pack them in a tin or box and make sure that there isn’t any cookie movement. Also, label the box fragile to help it not get tossed around so much.
Make Ahead: You can make the cookie dough 2-3 days ahead of time and keep tightly wrapped in the fridge until you are ready to use. Then simply add the caramels and bake.

Day 15: Chocolate Butter Cookies

10-20-08 348 copy

If Christmas had a signature cookie, sugar cookie cut-outs would be it. Every year more and more sugar cookies are cut out, baked and then decorated. Saaaaaame oooooold.

Tired of the same old, same old?

Let me introduce you to the best chocolate cut-outs I’ve gotten my hands on. These bad boys are…. well, bad. Bad = good. You with me? Good.

1 2 3

Day 15 of my Christmas extravaganza! Tired of sugar yet? NO? Me either 😉

These cookies are the perfect answer to your longing change from the boring same old. These are sturdy, crumbly, chocolatey, buttery GOODNESS! They come together quickly, chill overnight and you are ready to roll (out your dough)! Just be sure to bake these up on a flat cookie sheet, unlike me. You’ll end up with weird bubbles on the surface.

Whatever you do with these, whether you serve em plain or decorate with royal icing, promise me you’ll eat just one with caramel drizzle. Promise? You won’t regret it.

10-20-08 308 copy

Chocolate Butter Cookies
Yields about 2 dozen 2-inch cookies

Ingredients:
20 tablespoons unsalted butter (2 1/2 sticks), softened to cool room temperature (about 65 degrees)
1/2 cup cocoa powder (about 2 ounces)
1 teaspoon espresso powder
1 cup sugar (7 ounces)
1/4 teaspoon table salt
2 large egg yolks
1 tablespoon vanilla extract
2-1/4 cups unbleached all-purpose flour (11 1/4 ounces)

Instructions:
1. Adjust oven rack to middle position; heat oven to 375 degrees. Melt 4 tablespoons butter in medium saucepan over medium heat. Add cocoa powder and espresso powder; stir until mixture forms smooth paste. Set aside to cool, 15 to 20 minutes.

2. In standing mixer fitted with paddle attachment, mix remaining 16 tablespoons butter, sugar, salt, and cooled cocoa mixture on high speed until well combined and fluffy, about 1 minute, scraping sides of mixing bowl once or twice with rubber spatula. Add yolks and vanilla and mix on medium speed until thoroughly combined, about 30 seconds. Scrape sides of bowl. With mixer running on low, add flour in three additions, waiting until each addition is incorporated before adding next and scraping bowl after each addition. Continue to mix until dough forms cohesive ball, about 5 seconds. Turn dough onto counter; divide into three 4-inch disks. Wrap each disk in plastic wrap and refrigerate until dough is firm yet malleable, 45 to 60 minutes. (Alternatively, shape dough log, 2 inches in diameter and about 12 inches long; use parchment paper or plastic wrap to roll into neat cylinder. Chill until very firm and cold, at least 1 hour.)

3. Roll out 1 dough disk between 2 large sheets parchment paper to even thickness of 3/16 inch. (If dough becomes soft and sticky, slide rolled dough on parchment onto baking sheet and rechill until firm, about 10 minutes.) Peel parchment from one side of dough and cut into desired shapes using cookie cutter(s); using thin metal spatula, place shapes on parchment-lined baking sheet, spacing them about 1 inch apart. Gather dough scraps and chill. (For cylinder-shaped dough, simply slice cookies 1/4 inch thick and place on parchment-lined baking sheets.)

4. Bake until cookies show slight resistance to touch, 10 to 12 minutes, rotating baking sheet halfway through baking time; if cookies begin to darken on edges, they have overbaked. Cool for 5 minutes, then, using spatula, transfer cookies to wire rack; cool completely. Repeat steps 3 and 4 with remaining dough disks and scraps, rerolling scraps just once. Decorate as desired.

10-20-08 352 copy

Shipping Safe: YES. These are sturdy and can hold up to being shipped.
Make Ahead and Freeze: YES. Just make the dough, form into a disc, wrap tightly and freeze until ready to roll and bake.

Day 12: Ginger Chocolate Brownies

10-20-08 338 copy

It’s no new-found discovery that ginger and chocolate go well together. I mean with all the chocolate gingerbreads and chocolate ginger cookies out there… there’s no way that it could be wrong.

But something about these brownies had me a bit irked. I can’t describe it but a brownie… flavored with ginger? I just wasn’t sure. But I wanted to take a chance, take that culinary leap. Mostly, I just wanted to be able to tell myself ‘pssssh, and you were worried?’

Sometimes I worry too much. There’s nothing to worry about with these. They are delish! Pinky promise.

1 2
3 4

It’s day 12 of my baking extravaganza, and I’m still going strong. About halfway through, but not to worry… I have plenty left to share!!

These fall into the ‘fudgy’ end of the brownie spectrum, but not overly so. I’d say it’s pretty close to perfect. I was expecting the signature paper-thin crackly crust but I think I underbaked just a bit, so that error lies with me. Otherwise, the flavor really is phenom. But when dealing with Martha, you tend to already expect that.

10-20-08 331 copy

Chocolate-Ginger Brownies
adapted from Martha Stewart’s Cookies via Delicious Delicious Delicious

Ingredients:
1/2 cup (113g) unsalted butter, plus extra for greasing
3 oz (75g) dark chocolate, broken into squares
1 cup (200g) caster sugar
2/3 cup (95 g) plain flour
1/4 cup (30g) cocoa
2 eggs
1 tsp fresh root ginger, grated
1/2 tsp vanilla
1/2 tsp nutmeg
1/2 tsp ground ginger
1/4 tsp salt
1/8 tsp ground cloves

Instructions:
Pre-heat the oven to 350°C and grease and line a 8×8 square baking tin.

Melt the butter and chocolate together in a medium sized saucepan over a low heat (you can also do this in a microwave safe bowl in the microwave for 15-30 second bursts). Remove from heat and allow to cool slightly.

Add all the other ingredients and stir until smooth. (I put the flour, cocoa powder and spices in a separate bowl and whisked until thoroughly combined. I added the sugar and whisked together. Then the eggs, one at a time, and whisked until blended. Then the ginger and vanilla. Last, I added the flour mixture and stirred until just combined.)

Pour the batter into the lined pan and bake until set. Mine were done at 25 mins so start checking around then.

Cool in the pan, and then cut into 16 squares. Or however many you like.

Top with a divine caramel sauce to really take them over the top!!

10-20-08 336 copy

Shipping Safe: YES. Wrap tightly and place in a tin or a small box.
Make Ahead and Freeze: YES. Brownies are a great bake and freeze treat.

Day 8: Divine Caramel Sauce

10-20-08 343 copy

Would you mind if I just waxed poetic on caramel for a moment? What’s that? You love caramel too? Well I’ll be darned.

Caramel is the baking god’s gift to us simple folk. It is rich and creamy and luscious and just straight up divine! You can make it into candy, or swirl it into brownies. You can drizzle it on ice cream or add a dollop to your morning coffee. It is perfect.

1 2 3

But dang is it a pain to make!! Either it gets burned or bitter or you cook it past the hard ball stage, whatever the heck THAT is. But not this one. There are no thermometers needed, no finicky stages and no burnt to high hell sugar.  Problem solved, you’re welcome.

Welcome to Day 8 of my extravaganza. Come on in, take a load off. Grab a spoonful of this caramel sauce and ‘mmmm’ with me. It’s not weird, I promise!

10-20-08 336 copy

Divine Caramel Sauce
Yields about 2-1/2 cups of sauce

Ingredients:
1 cup light corn syrup
1 1/4 cups packed brown sugar
1/4 cup butter or margarine
1 cup whipping (heavy) cream

Instructions:
In 2-quart saucepan, over med-med high heat corn syrup, brown sugar and butter to boiling over low heat, stirring constantly. Boil 5 minutes, stirring occasionally. It will begin to get a bit darker in color. (At this point you can choose to let it go farther for a few more mins to get a nice depth, I would say no more than 8 mins).

Stir in whipping cream; heat to boiling. Remove from heat and let it sit in the pot or heat proof bowl. Allow to cool about 30 minutes. Serve warm. Caramel will be on the thin side when still warm. For thicker sauce: refrigerate overnight, give it a good stir and use as you wish.

Store covered in refrigerator up to 2 months.

10-20-08 346 copy

Shipping Safe: YES. Put it in a mason jar and close lid tightly, tie it with a pretty ribbon. Wrap really well in bubble wrap or the like and it’s ready to ship to your lovely Aunt.
Make Ahead and Freeze: ? I am not sure if this would freeze well. I wouldn’t see why not, but I haven’t tried for myself. If you do freeze it, please let me know how it works out for you.

TWD – Caramel Pumpkin Pie (Rewind)

Today’s post was supposed to be this amazing (I’m sure) cranberry shortbread cake. And I promise I’ll have that up next week as I’ll be skipping the cranberry galette.

Hey, we all need to cut corners sometimes right?

I have a lot on my metaphorical plate these days:

I have to make a baby shower cake and attend said baby shower this weekend.

I have to prep the blog for a giveaway I’m doing next week.

I have to make about 30 mini red velvet cakes and figure out how to ice them simply but beautifully.

I have to make and personalize 30 place cards.

I have to make 2 mini cakes: a rice krispy treat cake and a chocolate cake.

I have to make and arrange at least 3 floral centerpieces.

Oh yah, and I have to remember to get married on Friday 😉

So as you see, lots to do. So I’ll leave you with this pie which is pretty good, but not my favorite.

10-20-08 249 copy

It’s a standard pumpkin pie base with some homemade caramel thrown in for flair. I couldn’t really detect the taste of the caramel, so I may not have let it cook long enough. But it was pretty deep in color so I took it off once it looked as Dorie described.

3 4 5

Once you have the caramel made, it comes together pretty quickly and bakes up beautifully. But for some reason my pie filling didn’t want to stick to the pie crust. I guess that’s what I get for having the pie crust in my fridge for 2 days before filling it. Oops!

2 1

For the recipe, head on over to Janelle’s blog, Mortensen Family Memoirs or simply click here to be taken directly to it.

10-20-08 248 copy